Understand the dental implant timeline from consultation to crown. Explore stages and what to expect for your smile transformation!
Your Dental Implant Timeline: What to Expect at Each Stage
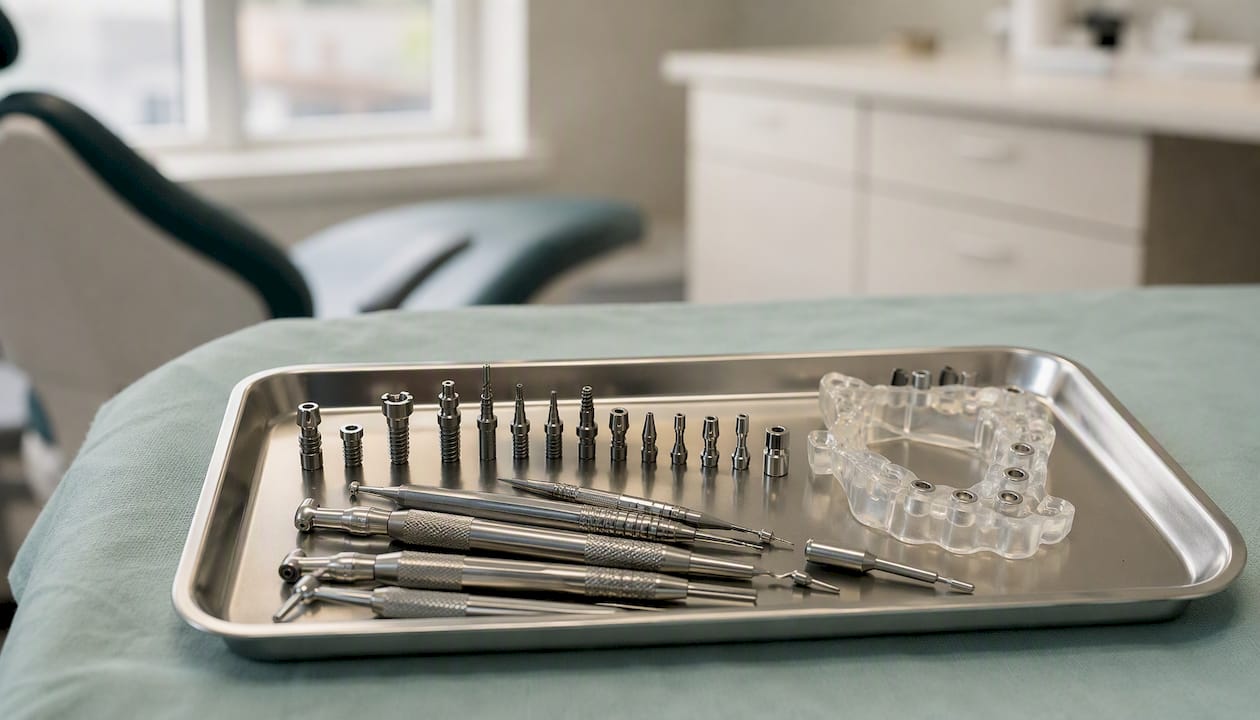
Most single-tooth dental implant treatments typically require several months from the first consultation to the final crown. If your case requires bone grafting or a staged extraction, expect additional months extending the total treatment time. As Mayo Clinic explains, implant surgery is done in stages, and the bulk of that time reflects bone healing rather than chair time. Here is how the three most common scenarios break down:
- Simple single-tooth case: Implant placement followed by a several-month healing phase of osseointegration (the process of bone fusing to the titanium post), then abutment and crown. Total treatment time typically spans several months.
- Case with extraction or bone grafting: Add 3–6 months for the graft to mature before the implant can even be placed. Total: 9–12+ months.
- Same-day (immediate-load) implants: A provisional crown is attached the same day as placement for qualifying patients with sufficient bone density and no active infection. Total treatment time is generally shorter but still requires several months for final healing and restoration.
A consultation with CBCT (cone beam computed tomography) imaging is the only way to know which path fits your anatomy. That one appointment sets the entire plan.
Key Takeaways
A straightforward single-tooth implant typically takes 5–8 months from consultation to final crown; cases requiring bone grafting or complex staging commonly extend to 9–12 months or more.
| Point | Details |
|---|---|
| Simple case timeline | Expect 5–8 months from consultation to final crown with no grafting needed. |
| Grafting adds significant time | Bone graft maturation adds 3–6 months, pushing total treatment to 9–12+ months. |
| Osseointegration is the core wait | Bone-to-implant fusion takes 3–6 months in the lower jaw and 4–6 months in the upper jaw. |
| You will not be left without a tooth | Flippers, bonded temporaries, or immediate provisionals keep your smile intact during healing. |
| Clayton Dental Studio | Offers full-scope implant care with CBCT imaging, grafting, CEREC crowns, and personalized timelines in Humble, TX. |
Table of Contents
- What the dental implant timeline looks like, step by step
- What healing actually feels like after each stage
- Factors that can lengthen or shorten your timeline
- How you will look and eat while the implant integrates
- Understanding costs at each phase of treatment
- Questions to ask your dentist and red flags to watch for
- A dentist’s perspective on why every timeline is personal
- Ready to get your personalized implant plan in Humble, TX?
- Sources
What the dental implant timeline looks like, step by step
Every stage has a purpose, and knowing what happens at each one makes the whole process feel far less uncertain. Cleveland Clinic notes that osseointegration alone can take 3–9 months, so understanding where that window falls in your overall sequence helps you plan your schedule and finances realistically.
The full treatment sequence
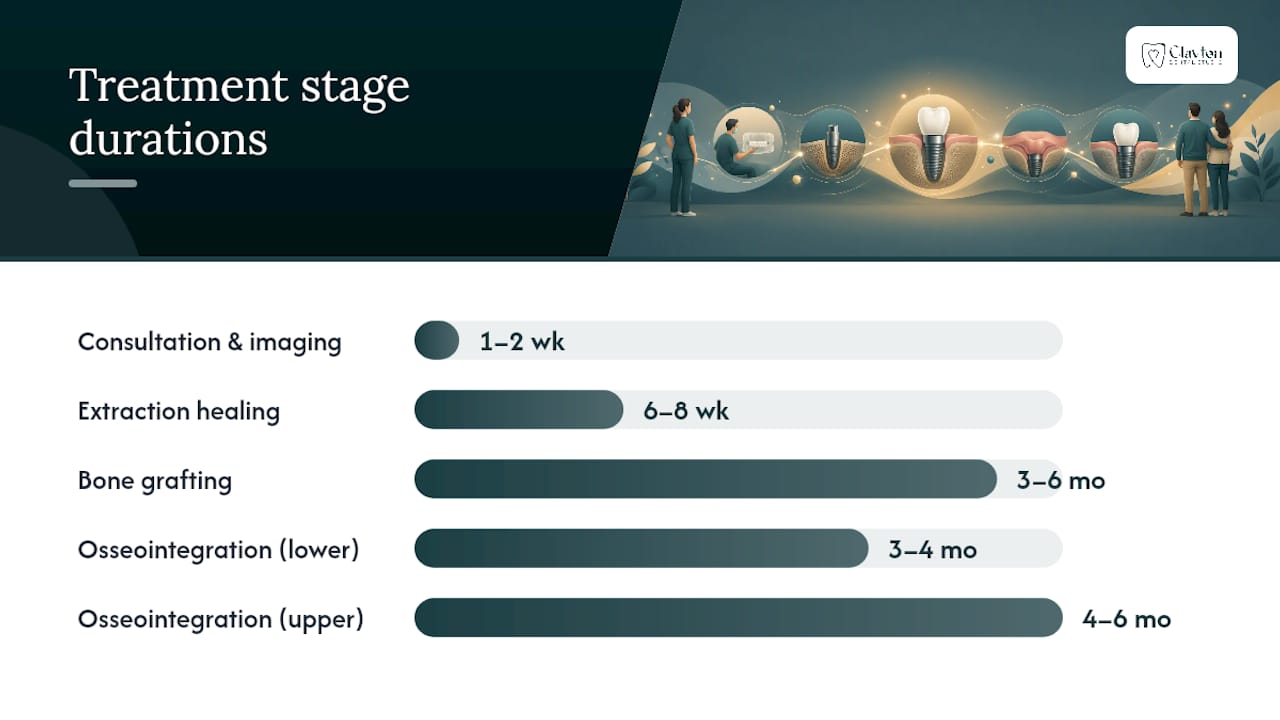
1. Consultation and 3D imaging (Week 1–2) Your dentist reviews your medical history, takes a CBCT scan, and evaluates bone volume, density, and the position of nerves and sinuses. This visit produces the treatment plan and cost estimate. One to two appointments.
2. Tooth extraction, if needed (Week 2–4) If the tooth is still present, it is removed. In some cases the implant can be placed immediately at the same visit (immediate placement); in others, the socket needs 6–8 weeks to heal before placement.
3. Bone grafting or sinus lift, if needed (Months 1–6) When bone volume is insufficient, a graft is placed and allowed to mature before the implant goes in. This is the single biggest timeline extender. Graft maturation typically takes several months depending on graft size and location.
4. Implant placement surgery (Day of surgery) The titanium fixture is placed into the jawbone under local anesthesia. For a single implant, the surgical appointment typically runs 1–2 hours. Most patients return to desk work within a day or two.
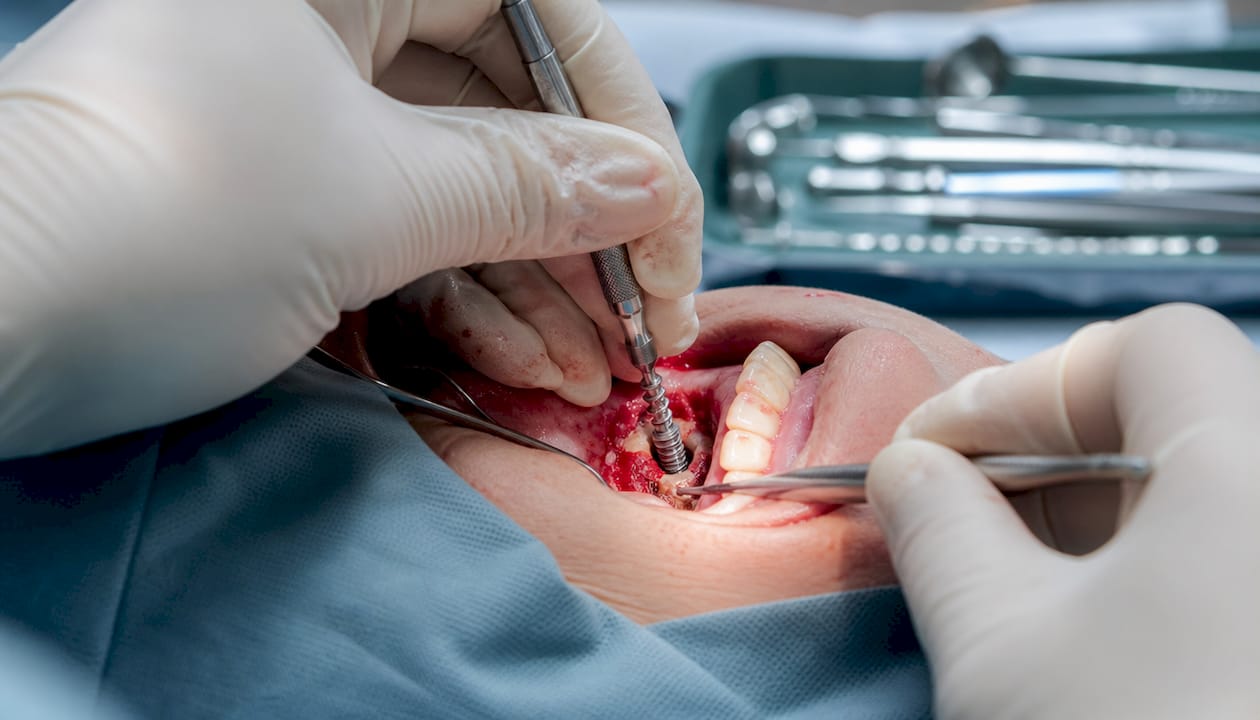
5. Osseointegration / healing (Months 2–9 post-placement) This is the passive waiting phase. The bone gradually grows into the implant surface. You have follow-up check-ins but no major procedures. Lower-jaw implants tend to integrate faster (3–4 months) than upper-jaw implants (4–6 months) because upper-jaw bone is less dense.
6. Abutment placement (One short visit) Once osseointegration is confirmed, a small connector piece (the abutment) is attached to the implant. Gum tissue then heals around it for 2–4 weeks before impressions are taken.
7. Final crown, bridge, or denture placement (1–2 visits) Impressions or a digital scan go to the lab. The final restoration is seated and adjusted. With in-office milling (CAD/CAM technology), some crowns can be fabricated the same day.
| Stage | Typical duration | What to expect |
|---|---|---|
| Consultation and imaging | 1–2 visits over 1–2 weeks | CBCT scan, treatment plan, cost estimate |
| Extraction (if needed) | 1 visit; 6–8 weeks healing | Socket healing before or concurrent with grafting |
| Bone graft / sinus lift (if needed) | 1 visit; 3–6 months healing | Graft maturation before implant placement |
| Implant placement | 1–2 hours chair time | Titanium post placed under local anesthesia |
| Osseointegration | 3–6 months (lower jaw); 4–6 months (upper jaw) | Passive healing, periodic check-ins |
| Abutment placement | 1 short visit; 2–4 weeks gum healing | Connector attached, gum tissue matures |
| Final restoration | 1–2 visits | Impression or scan, crown/bridge seated |
Pro Tip: Ask your dentist to use CBCT imaging before any surgical step. Three-dimensional planning lets the surgeon place the implant at the precise angle and depth for your bone anatomy, which shortens chair time, reduces the risk of surprises during surgery, and improves long-term stability.
What healing actually feels like after each stage
Recovery after implant surgery is usually more manageable than patients expect. Here is a realistic week-by-week picture, drawn from patient-oriented clinical guidance.
Weeks 1–2 after implant placement
- Swelling peaks around day 2–3, then gradually subsides.
- Mild to moderate soreness is normal; over-the-counter pain relievers typically manage it well.
- Stick to soft foods: yogurt, scrambled eggs, mashed potatoes, smoothies. Avoid anything crunchy or chewy on the surgical side.
- Most patients with desk jobs return to work within 1–2 days. Physical labor or intense exercise should wait at least a week.
- Keep the area clean with gentle saltwater rinses; avoid vigorous brushing directly on the surgical site.
Months 2–6 (osseointegration phase) This stretch feels uneventful, which is exactly how it should feel. The implant is integrating silently inside the bone. You will have periodic check-in appointments, but there is no discomfort from the implant itself. Maintain your normal oral hygiene routine around the site.
After abutment placement Mild gum tenderness for a few days is typical. The tissue shapes itself around the abutment over 2–4 weeks. This is a short, low-discomfort phase.
After final crown seating Some bite sensitivity for a few days is normal as you adjust to the new restoration. Your dentist will check the bite and make any needed adjustments at a follow-up visit.
Contact your dental office promptly if you notice any of these warning signs: persistent severe pain beyond the first week, swelling that worsens after day 3 instead of improving, a visible gap or movement in the implant, pus or discharge around the site, fever, or a foul taste that does not resolve. These can signal infection or early implant failure, both of which respond much better to early intervention than to waiting.
Pro Tip: Research from the NIDCR and clinical practice consistently link three patient behaviors to better healing outcomes: completing the prescribed antibiotic course, maintaining meticulous oral hygiene around the implant site, and quitting smoking before surgery. Smoking restricts blood flow to healing tissue and is one of the leading causes of implant failure.
Factors that can lengthen or shorten your timeline
No two cases move at exactly the same pace. Here is what actually drives the variation.
Patient health factors
- Smoking: Reduces blood supply to healing tissue, slows osseointegration, and significantly raises failure risk. Quitting at least 2 weeks before surgery and staying smoke-free through healing is strongly advised.
- Diabetes: Poorly controlled blood sugar impairs healing. Well-managed diabetes does not necessarily disqualify you, but your A1C level will influence the treatment plan.
- Age: Bone density tends to decrease with age, which can slow integration. Younger adults with good bone volume often heal faster.
- Oral hygiene and history of gum disease: Active periodontitis must be treated and resolved before implant placement. A history of gum disease does not disqualify you, but it requires more monitoring.
- Medications: Bisphosphonates (used for osteoporosis) and some immunosuppressants can affect bone healing. Always give your dentist a complete medication list.
Anatomic factors
- Upper vs. lower jaw: Upper-jaw bone is naturally less dense, so osseointegration takes longer and grafting is more often needed.
- Proximity to sinuses or nerves: Upper-jaw implants near the sinus may require a sinus lift. Lower-jaw implants near the inferior alveolar nerve require precise placement planning.
- Single tooth vs. multiple implants: Full-arch cases involve more surgical sites and longer healing coordination.
Procedural factors
- Immediate placement vs. staged: Placing the implant at the time of extraction saves one surgical visit but is only appropriate when the socket is infection-free and bone walls are intact.
- Bone grafting or sinus lift required: The single biggest timeline extender, adding 3–6 months before implant placement can proceed.
- Lab turnaround: Custom crowns and bridges typically take 2–3 weeks from impression to delivery. In-office CAD/CAM milling can eliminate that wait for single crowns.
- Insurance preauthorization: Administrative steps like preauthorization can add 2–4 weeks before treatment begins. Submit paperwork early.
What you can control
- Stop smoking well before surgery.
- Optimize blood sugar control if you have diabetes.
- Treat any active gum disease before the implant consultation.
- Follow all post-operative home-care instructions precisely.
- Keep every follow-up appointment, even when nothing feels wrong.
How you will look and eat while the implant integrates
One of the most common worries patients share is: “Will I have a gap in my smile for months?” The short answer is no. Cleveland Clinic confirms that temporary restorations are routinely used during healing so patients are not left without a tooth. Here are your main options.
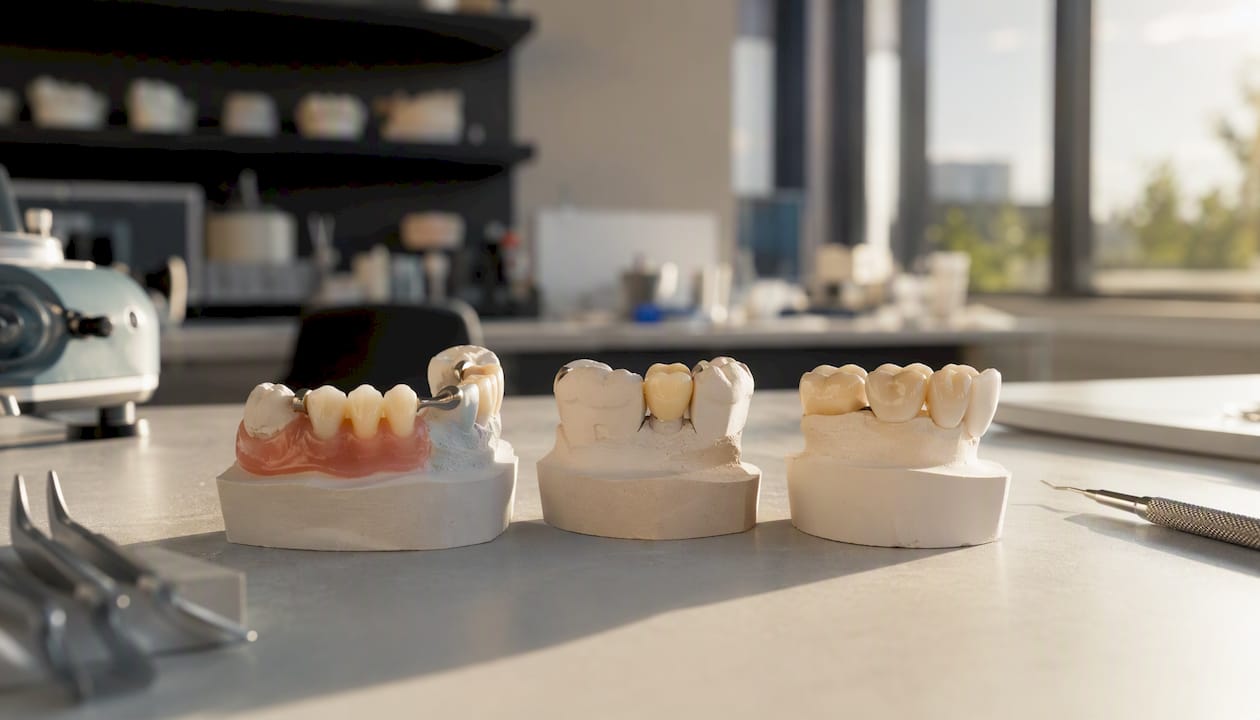
Removable flipper (acrylic partial denture) A lightweight, removable appliance with one or more artificial teeth. It clips onto adjacent teeth and is the most affordable temporary option. Flippers are easy to clean and replace, but they can feel bulky and should be removed while eating hard foods. They are not designed for long-term use.
Bonded temporary crown A provisional crown bonded to adjacent teeth or a temporary abutment. More stable than a flipper and looks natural. It is not as durable as a permanent crown, so avoiding hard or sticky foods on that side is still necessary.
Immediate provisional fixed bridge For patients who qualify for same-day or immediate-load protocols, a fixed provisional restoration is attached at the time of implant placement. You leave the office with teeth. This option requires sufficient bone density and a precise bite assessment; it is not suitable for every case.
Transitional removable partial Similar to a flipper but designed to replace multiple missing teeth. Useful for patients awaiting multiple implants or a full-arch restoration.
Practical eating guidance during healing Avoid hard, crunchy, or sticky foods on the implant side throughout osseointegration. Cut food into small pieces. Chew on the opposite side when possible. These habits protect both the temporary restoration and the integrating implant.
Pro Tip: Lab-fabricated provisionals fit more precisely and last longer than chairside temporaries made from composite resin. If your treatment plan includes a long osseointegration period (4+ months), ask about a lab-made provisional. The investment in a better-fitting temporary often means fewer adjustments and less irritation to the healing gum tissue.
Understanding costs at each phase of treatment
Dental implant costs in the United States vary widely by region, provider, and case complexity. The figures below are approximate ranges based on published clinic and patient-guide data; your actual costs will depend on your specific treatment plan.
Approximate cost components (U.S.)
- Consultation and CBCT imaging: $150–$500
- Tooth extraction: $150–$350 per tooth (simple); $250–$600 (surgical)
- Bone graft: $300–$3,000 depending on graft size and source material
- Sinus lift: $1,500–$5,000
- Implant fixture (titanium post): $1,000–$2,500 per implant
- Abutment: $300–$700
- Crown (porcelain or zirconia): $1,000–$2,500
- Total for a single-tooth implant (no grafting): approximately $3,000–$6,000
- Total with grafting or sinus lift: can reach $8,000–$12,000 or more
Insurance realities Some plans cover the crown but not the implant fixture. Medical insurance occasionally covers implants when tooth loss resulted from an accident or a medical condition. Preauthorization is typically required and can take 2–4 weeks to process, so submit it before scheduling surgery.
Financing options Third-party financing through programs like CareCredit or Lending Club Patient Solutions allows patients to spread costs over 12–60 months, often with promotional interest-free periods. Many dental offices also offer in-house payment plans.
Pro Tip: Before treatment begins, request a fully itemized written estimate that breaks out every component, including imaging, surgical fees, lab fees, and follow-up visits. Then submit that estimate to your insurance for a preauthorization determination. Knowing exactly what is and is not covered before you start prevents billing surprises mid-treatment.
Questions to ask your dentist and red flags to watch for
Going into your consultation prepared makes a real difference. Here is a practical checklist.
Questions to bring to your consultation
- Will I need CBCT imaging, and is it included in the consultation fee?
- Do I need a bone graft or sinus lift based on my current bone volume?
- Which implant system do you use, and why?
- Are you recommending a staged approach or immediate placement, and what is the reasoning for my case?
- What is the realistic full timeline for my specific situation?
- Can you provide a fully itemized written estimate?
- What does your follow-up schedule look like after placement?
- What happens if the implant does not integrate? Is there a warranty or re-treatment policy?
Red flags that suggest substandard care
- No CBCT scan recommended before implant placement. Two-dimensional X-rays alone are insufficient for safe implant planning.
- A vague or one-size-fits-all timeline with no explanation of your specific anatomy.
- Reluctance to provide an itemized written estimate.
- No discussion of bone volume or grafting needs when your records suggest deficiency.
- No defined follow-up protocol after surgery.
- Pressure to commit to same-day treatment before imaging is reviewed.
The AAID (American Academy of Implant Dentistry) publishes patient education resources that outline what a thorough implant evaluation should include. Reviewing those standards before your consultation gives you a useful benchmark.
Documentation to request Ask for a written treatment plan that lists each phase, the sequence of visits, estimated timing, and associated fees. A well-organized treatment plan is a sign of a well-organized practice.
A dentist’s perspective on why every timeline is personal
I’m Dr. Kamboj, and the question I hear most often is some version of: “Just tell me how long this will take.” I understand why. You have a life to plan around this. The honest answer is that the timeline is not arbitrary — it is determined by your bone, your health, and your anatomy, and no two cases are identical.
The decision points that most affect timing are: whether grafting is needed (the biggest variable), whether immediate placement is safe for your socket, and how your bone density compares between the upper and lower jaw — understanding these from detailed clinical study skincare technology explained can help patients interpret evidence behind implant success estimates. I make those calls based on CBCT imaging, not on a standard protocol applied to everyone.
Here is an anonymized example of how a real case progressed:
- Month 1: Consultation, CBCT imaging, treatment planning
- Month 2: Extraction of failing upper premolar; socket preservation graft placed at same visit
- Months 2–6: Graft maturation; patient wore a flipper temporary
- Month 6: CBCT confirmed adequate bone volume; implant placed
- Months 6–10: Osseointegration; periodic check-ins
- Month 10: Abutment placed; gum tissue shaped over 3 weeks
- Month 11: Final zirconia crown seated; bite adjusted
Total elapsed time: approximately 11 months. Without the graft, this case would have been closer to 6–7 months. Neither timeline is wrong — they are both right for the patient they belong to.
The most common planning mistake I see is underestimating graft maturation time. Patients (and occasionally providers) want to move to implant placement before the graft has fully consolidated. Rushing that window raises failure risk significantly. I always build in a buffer of at least 4 weeks beyond the minimum recommended healing time before placing an implant into a grafted site. Patience at that stage protects the entire investment.
Pro Tip: When reviewing your treatment plan, ask specifically how much buffer time has been built in around the graft maturation and lab fabrication phases. A plan with zero buffer is optimistic; a plan with 2–4 weeks of buffer at each critical junction is realistic and protects you from cascading delays.
What patient-centered implant care looks like at Clayton Dental Studio
At Clayton Dental Studio in Humble, TX, every implant consultation starts with a thorough clinical evaluation and 3D imaging so we can give you a timeline that reflects your actual anatomy, not a generic estimate. I take the time to walk through each phase with you, explain what we are waiting for and why, and make sure you always have a comfortable temporary option so you are never without a tooth during healing. My goal is that you leave the consultation with a clear, written plan and a realistic sense of what the next several months will look like for your specific case.
Ready to get your personalized implant plan in Humble, TX?
Clayton Dental Studio offers the full scope of implant-related care under one roof, which means fewer referrals, fewer scheduling gaps, and a single care team who knows your case from start to finish. Services relevant to your implant treatment include:
- CBCT 3D imaging for precise surgical planning
- Tooth extractions and socket preservation
- Bone grafting and sinus lift procedures
- Implant placement and osseointegration monitoring
- CEREC same-day crowns and lab-fabricated restorations
- Temporary and provisional restorations during healing
- Structured follow-up and long-term maintenance
Same-day or immediate-load restorations are available at Clayton Dental Studio but are case-dependent. Candidacy requires a CBCT assessment and clinical evaluation. Call our Humble office or book online to schedule your consultation and receive a written, itemized treatment plan tailored to your case.
Sources
Authoritative references for patients who want to read further on implant biology, patient standards, and oral health guidance:
This article is general information, not a substitute for advice from a qualified doctor. Consult a qualified healthcare professional about your own circumstances before acting on anything here.
Recommended
Ready to Schedule Your Appointment?
Dr. Kamboj and the Clayton Dental Studio team are here to help. Call us or book online today.