Protect your implant with evidence based daily care and clinic tested SPIC timing. Learn exact home steps, implant safe tools, and when to call Clayton...
3–4 Month SPIC Schedule: Clinic Tested Implant Care, Humble TX
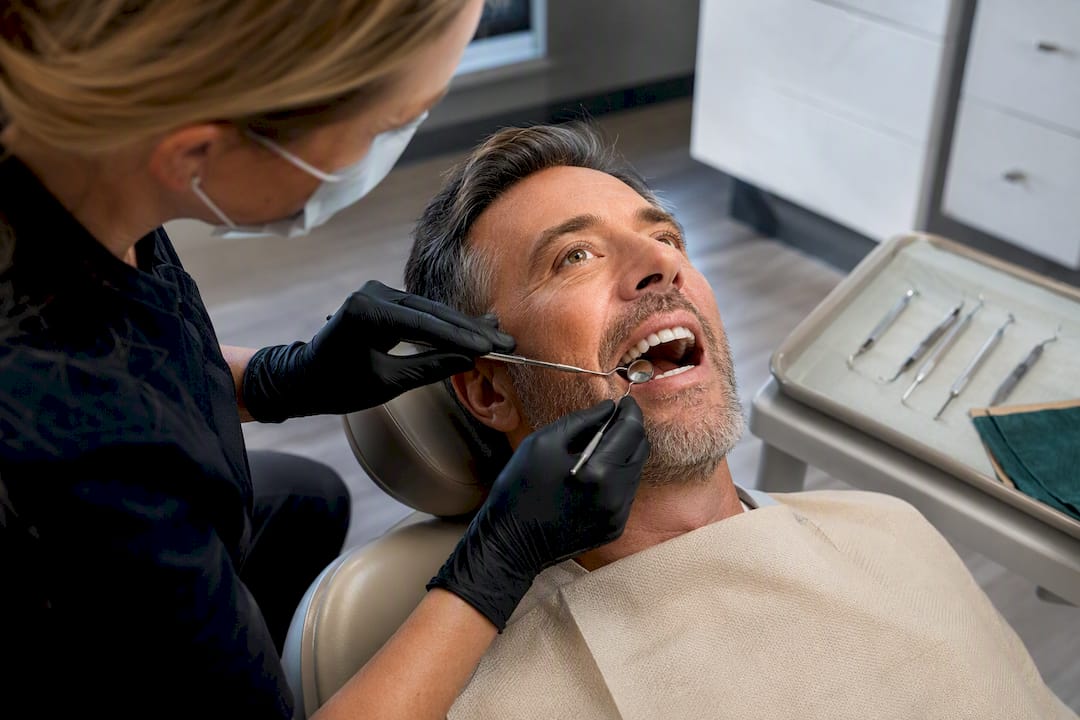
Protecting an implant comes down to two habits: brush twice daily with a powered oscillating-rotating toothbrush and clean between teeth every day with an interproximal brush or water flosser. Then keep your supportive peri-implant care visits regularly as recommended by your dental professional, with intervals tailored to your risk profile. Smoking, a history of periodontitis, and poorly controlled diabetes push that interval tighter. Call our office right away for pain, looseness, pus, or a sudden jump in bleeding when you brush.
TL;DR:
- Regular use of a powered oscillating-rotating toothbrush and properly sized interdental brushes significantly reduce inflammation and plaque around implants.
- Water flossers, used correctly after interdental cleaning, effectively flush debris from hard-to-reach spaces without damaging the implant surface.
- Supportive peri-implant care visits should be scheduled based on individual risk factors, with most seen every three to four months initially, then adjusted accordingly.
- Smokers, diabetics with poorly controlled blood sugar, and those with a history of gum disease require more frequent monitoring and stricter maintenance intervals.
- Implant surfaces are vulnerable to damage from aggressive instruments, so low-abrasive, implant-safe tools like glycine powder air-polishing are recommended for professional cleanings.
Table of Contents
- Your Daily Dental Implant Maintenance Routine
- What Happens at a Supportive Peri-Implant Care Visit
- Risk Factors That Change Your Maintenance Needs
- Why Instrument Choice Around Implants Matters
- Monitoring Your Implant: Radiographs and Warning Signs
- Peri-Implant Mucositis vs. Peri-Implantitis: What to Do at Each Stage
- Clinic-Tested Tips From Clayton Dental Studio
- Maintenance as a Partnership, Not a Checklist
- Scheduling Your Implant Maintenance Visit With Us
- Sources
Your Daily Dental Implant Maintenance Routine
Good dental implant maintenance starts long before you sit in a dental chair. It starts at your bathroom sink, twice a day, with the right tools used the right way.
A powered oscillating-rotating toothbrush outperforms a manual brush around implants, and the evidence isn’t subtle. Trial data shows powered brushes combined with interdental cleaning aids reduce bleeding on probing and inflammation more effectively than manual brushing paired with standard floss. The oscillating motion disrupts biofilm at the gum line, right where peri-implant tissue is most vulnerable. Use a soft, implant-safe brush head and angle the bristles gently at the crown margin. There’s no need to scrub. Let the brush do the work.
Interproximal brushes matter just as much as the toothbrush itself, and sizing them correctly is where most patients go wrong. A brush that’s too tight forces its way through the space and can nick the crown surface or irritate tissue. One that’s too loose does nothing. Your hygienist should size a brush to your specific gap and show you the angle before you take it home. For patients with wider embrasures under a bridge or full-arch prosthesis, floss threaders or superfloss sometimes work better than a brush.
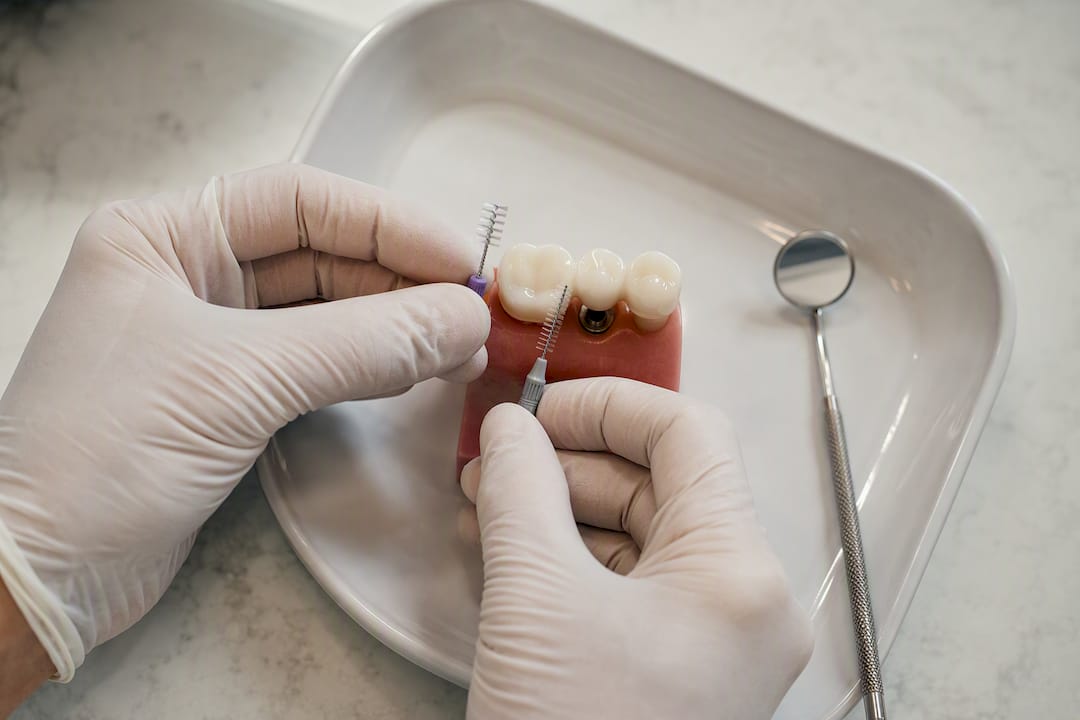
Water flossers have earned their place in implant care, not just as a novelty gadget. Used at a moderate pressure setting and aimed along the gum line rather than straight down into the sulcus, they flush debris from spaces a brush can’t reach. Many patients find the most efficient sequence is interproximal brush first, water flosser second, to loosen then rinse away plaque in one pass.
Mouthrinse choice deserves a straight answer: chlorhexidine (CHX) is a short-term tool, not a daily habit for life. It’s genuinely useful after a procedure or during a flare-up of inflammation, but recent analysis found mixed long-term benefits from chronic CHX use, along with possible increases in inflammatory markers with prolonged daily use. Use it when your clinician prescribes it for a defined period, then stop.
A few habits do more harm than good around implants:
- Metal dental picks or toothpicks can scratch the crown or abutment surface and should be avoided entirely.
- Overzealous scrubbing at the gum line irritates soft tissue without improving plaque removal.
- Chewing ice, hard candy, or using your teeth as tools stresses the prosthetic connection over time.
- Skipping interdental cleaning “on busy days” is the single most common lapse we see in patients who develop early inflammation.
Pro Tip: Keep your interproximal brush by your toothbrush, not in a drawer. Patients who store their tools together use them consistently; patients who have to go hunting for them skip days.
What Happens at a Supportive Peri-Implant Care Visit
Supportive peri-implant care, often abbreviated SPIC, is the professional half of implant maintenance, and it’s not interchangeable with a routine cleaning. A thorough maintenance visit updates your medical and dental history, examines soft tissue around each implant, checks for bleeding on probing, tests implant stability, and removes plaque and calculus your home routine can’t reach, with radiographic review added when clinical signs warrant it.
A typical SPIC appointment follows this sequence:
- History review, covering any new medications, health changes, or symptoms since your last visit.
- Visual and tactile exam of the peri-implant tissue, checking color, contour, and firmness.
- Gentle probing around each implant to measure pocket depth and check for bleeding.
- A stability check to rule out mobility, which can signal a deeper problem.
- Professional removal of plaque and calculus using implant-safe instruments.
- Radiographic review, when indicated, to compare bone levels against your baseline.
Scheduling isn’t one-size-fits-all, and it shouldn’t be. Guideline-level recommendations favor an individualized recall schedule, with most patients seen more frequently in the first year after loading, often every three to four months, then tapered to every three, six, or twelve months based on how your tissue responds and your personal risk factors. The payoff for sticking to this schedule is measurable: long-term data on patients who kept up with maintenance found a notably lower rate of peri-implantitis compared with those who did not maintain regular care.
Expect a visit that includes implant assessment to last typically about an hour. Full-arch prostheses often require longer visits due to the complexity of evaluation and cleaning.
A few questions worth asking your hygienist at every visit:
- Which instruments will you use around my implants, and why?
- Based on my tissue today, does my recall interval need to change?
- Are there early signs here that would benefit from seeing a specialist?
Risk Factors That Change Your Maintenance Needs
Not every implant patient carries the same risk, and pretending otherwise does a disservice to anyone trying to plan realistically. A history of periodontitis, inconsistent plaque control, and gaps in professional maintenance are consistently linked to higher rates of peri-implant disease. If you lost your natural teeth to gum disease, your implants are not automatically protected from the same biological process.
Smoking is one of the clearest modifiable risks in implant dentistry. It restricts blood flow to healing tissue and interferes with the bone integration process that keeps an implant stable long term. We’ve covered this in more detail in our piece on smoking and dental implants, but the short version is that quitting, even temporarily around the time of placement, measurably improves outcomes.
Diabetes matters just as much, particularly when blood sugar runs consistently high. Poor glycemic control slows healing and impairs the body’s ability to fight off the low-grade inflammation that precedes peri-implant mucositis. Patients managing diabetes well tend to see implant outcomes comparable to patients without diabetes at all.
Prosthesis design plays a quieter but real role. A crown or bridge built with tight, hard-to-clean contours for cosmetic reasons can trap plaque in spots your interproximal brush can’t reach. If you’re struggling to clean around a restoration no matter how careful you are, that’s worth raising with your dentist. Sometimes a slightly less aggressive contour buys you dramatically easier hygiene.
A short list of behaviors that move the needle on risk:
- Quit smoking, or at minimum, cut back significantly before and after implant placement.
- Keep A1C levels in a well-controlled range if you have diabetes.
- Attend every scheduled maintenance visit, even when nothing feels wrong.
- Flag hard-to-clean prosthesis areas early rather than living with them for years.
Why Instrument Choice Around Implants Matters
The tools your hygienist reaches for can either protect your implant surface or damage it, and this is one area where patients rarely think to ask questions. Titanium is remarkably strong, but it’s also softer than the steel in a traditional scaling curette. Clinicians are advised to avoid aggressive instrumentation that alters implant surface topography, because even microscopic scratches create rougher surfaces that trap plaque more easily going forward.
That’s why glycine powder air-polishing has become a preferred method for professional implant cleaning. Systematic reviews of randomized trials favor glycine powder air-polishing and ultrasonic devices with nonmetallic tips over traditional metal curettes for reducing inflammation while protecting the implant surface. The powder is fine enough to disrupt biofilm without abrading titanium, and it tends to be more comfortable for patients too. Air-polishing with a low-abrasive powder also does a better job than some metal instruments at preserving that surface over years of repeated cleanings, according to the British Dental Journal.
The general principle your hygienist should be following:
- Low-abrasive powders over aggressive scaling for routine biofilm removal.
- Nonmetal or plastic-tipped ultrasonic instruments when mechanical debridement is needed.
- Conservative power settings, adjusted for the sensitivity of peri-implant tissue.
- Metal curettes reserved only for natural teeth, never for implant surfaces.
Pro Tip: If you’re ever unsure what your hygienist is using, just ask. “Is that tip safe for implants?” takes five seconds and tells you a lot about the practice’s approach to implant-specific care.
Monitoring Your Implant: Radiographs and Warning Signs
Bone levels around an implant tell a story that soft tissue alone can’t. Standard practice compares a baseline radiograph against images taken at 6 to 8 months and again at the one-year mark, then spaces out imaging further if everything looks stable.
The literature commonly references specific bone loss thresholds as red flags: crestal bone loss of 1.5 millimeters or more in the first year, or more than 0.2 millimeters annually after that. These numbers aren’t a diagnosis on their own. They’re a comparison point your dentist uses alongside clinical findings to decide whether something needs closer attention.
Watch for these signs between visits:
- Probing depths that are creeping up compared to previous measurements.
- Bleeding on probing at multiple sites around the same implant.
- Any suppuration, meaning visible discharge or pus at the gum line.
- Mobility of the implant itself, which is never normal and always warrants an urgent call.
If any of these show up, more frequent imaging or a referral to a specialist may follow, especially when several signs appear together rather than in isolation.
Peri-Implant Mucositis vs. Peri-Implantitis: What to Do at Each Stage
Getting this distinction right changes how urgently you need to act. Peri-implant mucositis is inflammation confined to soft tissue with no bone loss, while peri-implantitis involves that same inflammation plus progressive bone loss around the implant. One is reversible with the right response. The other requires more aggressive intervention to stop it from progressing.
If you’re diagnosed with mucositis, here’s the typical escalation path:
- Intensify your home care, often with closer attention to interdental cleaning technique and frequency.
- Get a professional debridement using air-polishing or ultrasonic instruments with nonmetallic tips.
- Use short-term adjunctive CHX rinse if your clinician recommends it for a defined period, not indefinitely.
- Return for reassessment, typically within a few weeks, to confirm the inflammation is resolving.
When non-surgical care doesn’t resolve things, that’s the signal to escalate. Deep pockets that don’t improve, continued bone loss on radiographs, or persistent suppuration point toward peri-implantitis that needs surgical management. We go into the surgical and non-surgical options in more depth in our guide to peri-implantitis treatment. A useful benchmark clinicians use for gauging treatment success: no more than one bleeding site remaining and no suppuration, reassessed at two to three months after non-surgical therapy.
Once inflammation resolves, whether through non-surgical care or after a surgical procedure, your maintenance schedule typically tightens back up for a while. Expect a return to more frequent SPIC visits, similar to the first-year pace, until your tissue proves stable again.
Clinic-Tested Tips From Clayton Dental Studio
Guidelines tell you what should happen. Years of chairside experience tell you how to actually make it happen with real patients. At Clayton Dental Studio, we’ve found that patients who get a hands-on demonstration, not just verbal instructions, at their first hygiene visit after loading stick with proper technique far longer than patients who are simply handed a brush and told to use it.
We also recommend keeping a written or photo record of your implant brand and model. It sounds like a small detail, but the FDA specifically advises patients to keep this information on hand, and it matters enormously if you ever need care from a different provider or an emergency visit years down the road. Pair that with your baseline radiographs, and any future clinician has what they need to spot changes accurately.
A few corrections we make often in daily practice:
- “Vigorous brushing” isn’t the goal. Firm, gentle, consistent pressure protects tissue better than scrubbing.
- Bleeding once doesn’t mean panic, but bleeding at the same site repeatedly means call us.
- Stop any new home product (rinse, powered flosser attachment) if it causes persistent discomfort, and ask before restarting.
Maintenance as a Partnership, Not a Checklist
Implant maintenance works best when it’s a genuine back and forth between you and your dental team, not a set of instructions handed down once and forgotten. The patients who keep their implants healthiest longest are the ones who show up consistently, ask questions, and treat their recall visits as seriously as their daily brushing. Bring your implant records to every appointment, and ask directly for a maintenance plan built around your own risk factors rather than a generic schedule. That conversation, more than any single tool or technique, is what protects your investment and your quality of life for years to come.
— Clayton Dental Studio
Scheduling Your Implant Maintenance Visit With Us
If you’re due for a checkup or you’ve noticed any changes around an implant, that’s the moment to call rather than wait for your next scheduled cleaning. Professional dental offices offer implant-safe hygiene using nonmetallic instrumentation, implant exams paired with radiographic review when needed, and peri-implant health assessments designed to catch mucositis before it becomes something more serious.
Booking is straightforward through our dental hygiene services page, where you can see what a maintenance visit includes before you arrive. When you come in, bring any records you have of your implant brand and model along with prior radiographs. If you’re weighing costs and coverage as part of your planning, this guide to Medicare and dental implant coverage is a useful starting point for understanding your options. Dental care teams typically review patient history and tissue at every visit and adjust recall intervals based on actual tissue condition, not a generic timetable. Call our Humble office or book online through our services page to get on the schedule.
This article is general information, not a substitute for advice from a qualified doctor. Consult a qualified healthcare professional about your own circumstances before acting on anything here.
Sources
- Frontiers in Oral Health (2025) - evidence for powered toothbrush and interdental aids
- Implant Maintenance: A Clinical Update - PMC (2014)
- Dental implants: What you should know | FDA
Recommended
Ready to Schedule Your Appointment?
Dr. Kamboj and the Clayton Dental Studio team are here to help. Call us or book online today.